Have you ever thought about creating a wonderful raised bed garden? If so, you’re in for a rewarding experience that can not only beautify your outdoor space but also provide you with fresh, homegrown produce. Let’s walk through the steps together on how to create your own raised bed garden, from planning to planting, and everything in between.
This image is property of images.unsplash.com.
What is a Raised Bed Garden?
Raised bed gardens are simply garden beds that are elevated above the surrounding soil. This method offers a variety of benefits that can enhance your gardening experience significantly. You may find that these beds improve drainage, deter pests, and create a more organized gardening space.
Benefits of a Raised Bed Garden
You might wonder why you should choose a raised bed over traditional gardening methods. Here are some compelling reasons:
-
Improved Drainage: The soil in raised beds tends to drain better than in-ground gardens, which is particularly beneficial if you live in an area with heavy rains.
-
Better Soil Quality: You have complete control over the soil mix, allowing you to enhance the quality with compost and nutrients, which can lead to healthier plants.
-
Easier Maintenance: With the height of a raised bed, bending over to weed or harvest becomes much less strenuous on your back.
-
Extended Growing Season: The soil in raised beds tends to warm up faster in the spring compared to conventional gardens, allowing you to plant earlier.
Planning Your Raised Bed Garden
Before you rush to the hardware store or garden center, take a moment to plan your garden. Here are a few considerations that can help you lay the groundwork effectively.
Choosing the Right Location
The first step is to select an ideal spot for your raised bed garden. Look for an area that receives at least 6-8 hours of sunlight daily. This amount of light is crucial for the growth of most vegetables and plants. Also, make sure the area is easily accessible for watering and harvesting.
Determining Your Size
How big do you want your raised bed to be? Generally, a width of 4 feet allows you to reach the center from either side without stepping into the bed, which could compact the soil. The length can vary depending on your space and needs, but many gardens are about 6 to 8 feet long.
Common Dimensions for Raised Beds
| Size | Width | Length | Height |
|---|---|---|---|
| Small | 2′ | 4′ | 12″ |
| Medium | 4′ | 4′ | 12″ |
| Large | 4′ | 8′ | 12″ |
Selecting Materials for Your Raised Bed
Another critical aspect is choosing what materials to use for the construction of your raised bed. Some popular options include:
-
Wood: Untreated cedar or redwood are excellent choices due to their durability and resistance to rot.
-
Metal: Galvanized metal beds offer a modern look and long-lasting durability.
-
Composite: Made from recycled materials, composite lumber can be a sustainable choice.
Consider your budget and the aesthetic you would like to achieve in addition to the durability of the material.
This image is property of images.unsplash.com.
Building Your Raised Bed
Now that you have a plan in place, it’s time to gather your materials and build your raised bed. This process can be quite enjoyable and straightforward!
Tools You Will Need
Make sure you have the following tools on hand:
- Measuring Tape
- Saw (if working with wood)
- Drill (with wood screws, if applicable)
- Level
- Hammer (for wooden beds)
- Landscape Fabric (to prevent weeds)
- Gloves (to protect your hands)
Step-by-Step Construction
-
Measure and Cut: Measure out your desired dimensions and cut the wood or metal to size. If you’re using wood, make sure your cuts are straight to ensure a good fit.
-
Assemble the Frame: Connect the corners using screws or nails (for wood). If you’re using metal, refer to the manufacturer’s instructions for assembly.
-
Ensure Stability: Use a level to ensure your frame is even. This is especially important for drainage.
-
Ground Preparation: Before placing your bed, you may want to remove existing grass or weeds in the area. This can usually be done by digging up the sod or covering it with cardboard for a few weeks to smother the grass.
-
Install Landscape Fabric: If you’re worried about weeds, laying down landscape fabric inside the bed can help. This will allow water and nutrients through while preventing weeds from growing up into your garden.
Filling Your Raised Bed with Soil
Once your bed is built and ready, it’s time to fill it with soil. This step is critical because the soil you choose will greatly impact the success of your plants.
Selecting the Right Soil Mix
For optimal plant growth, you should use a mix of soil, compost, and other organic materials. A popular mix is:
- 1/3 topsoil
- 1/3 compost
- 1/3 peat moss or coconut coir
Importance of Each Component
| Component | Benefits |
|---|---|
| Topsoil | Provides essential nutrients and minerals |
| Compost | Enriches the soil with organic materials |
| Peat Moss / Coir | Improves water retention and aeration |
Filling the Bed
Add your soil mix to the raised bed gradually, filling it to a few inches below the top edge. Remember to pack the soil down lightly as you fill to minimize settling later on.
This image is property of images.unsplash.com.
Planting Your Raised Bed Garden
With your raised bed constructed and filled with nutrient-rich soil, you’re ready to plant! This is the exciting part where you can unleash your creativity and grow your favorite plants.
Choosing Plants
Consider the climate in your area and choose plants that will thrive. Some popular options for raised beds include:
- Vegetables: Tomatoes, peppers, lettuce, spinach, and carrots.
- Herbs: Basil, parsley, cilantro, and mint.
- Flowers: Marigolds, nasturtiums, and sunflowers for added beauty and pest deterrence.
Planning Your Layout
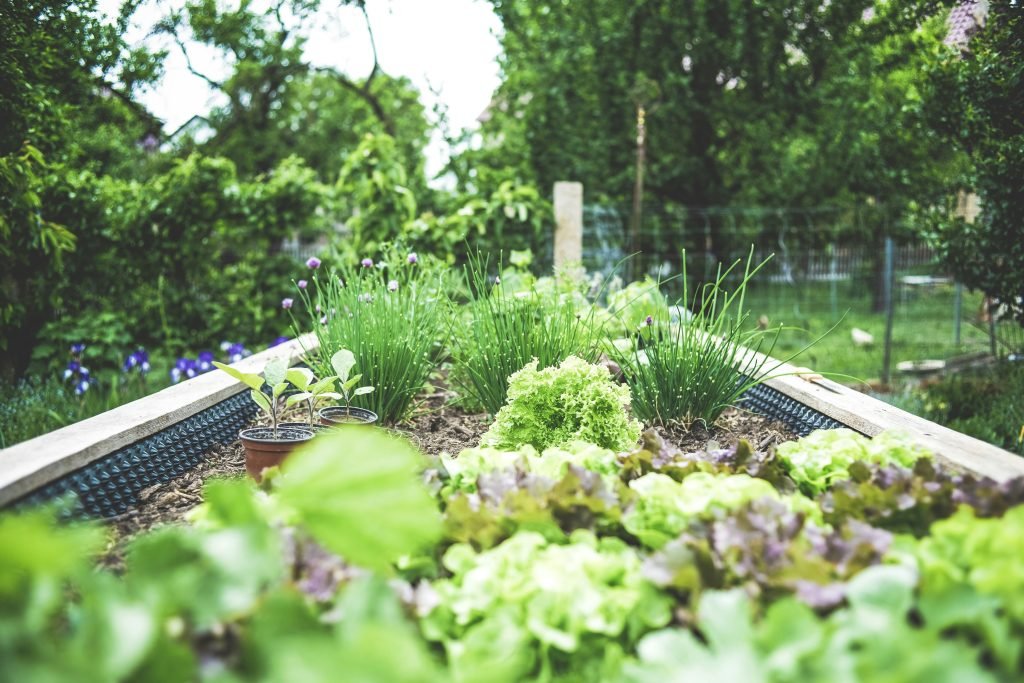
Once you’ve chosen your plants, plan their layout in your raised bed. Be mindful of the recommended spacing for each plant type. Taller plants should go in the back of the bed if it’s against a wall or fence, with shorter plants in the front.
Visual Layout Example
| Plant Type | Spacing Requirements |
|---|---|
| Tomatoes | 24-36 inches apart |
| Lettuce | 6-12 inches apart |
| Herbs | 12 inches apart |
| Carrots | 2-4 inches apart |
Planting
When you’re ready to plant, follow these steps:
-
Dig Holes: Use your hands or a garden trowel to dig holes for each plant according to their spacing needs.
-
Plant Carefully: When placing each plant in the hole, be careful not to damage the roots. Fill in around the roots with soil and gently press down.
-
Water: After planting, give your new garden a deep watering to help settle the soil around the roots.
Maintaining Your Raised Bed Garden
Once you’ve planted your garden, the work doesn’t end there. Regular maintenance will ensure your plants thrive and produce healthy yields.
Watering
Watering is crucial, especially right after planting. You may need to water your raised bed more frequently than traditional gardens because the soil can dry out quicker. A good rule of thumb is to provide about an inch of water per week, depending on rain and temperature.
Weeding
Keep an eye on weeds, as they can compete with your plants for nutrients and water. Pull them out as soon as you see them to keep your garden healthy.
Mulching
Adding a layer of mulch can help retain moisture and suppress weed growth. Organic options like straw, wood chips, or shredded leaves work well. Spread a 2-3 inch layer around your plants but ensure it doesn’t mound against the stems.
Fertilizing
As the growing season progresses, you may need to fertilize your plants. Organic options like compost tea or fish emulsion can provide a nutrient boost without chemicals. Just follow the instructions on the packaging for the best results.
Dealing with Pests and Diseases
A key part of gardening is learning how to manage pests and diseases. While the elevated nature of raised beds can help deter some critters, you might still encounter a few challenges.
Integrated Pest Management
Using integrated pest management techniques can help you keep your garden healthy without excessive use of chemicals. Consider the following:
- Beneficial Insects: Introduce ladybugs or lacewings, which feed on aphids and other harmful bugs.
- Companion Planting: Plant certain combinations that may deter pests. For instance, marigolds can repel nematodes and other insects.
- Physical Barriers: Floating row covers can protect your crops from pests and harsh weather conditions.
Recognizing Plant Diseases
Be alert for signs of plant diseases such as wilted leaves, spots, or discoloration. Remove affected plants immediately to prevent the spread of disease. Proper spacing and good air circulation can also reduce disease risk.
Harvesting Your Crops
After all your hard work, it will eventually be time to reap the rewards of your gardening efforts! Harvesting at the right time is key to enjoying the best flavors and nutrition from your crops.
When to Harvest
Ensure you know when to harvest your crops. Vegetables like tomatoes should be picked when they are fully colored and slightly soft to the touch. Leafy greens can be harvested throughout the growing season; pick the outer leaves first for continued growth.
How to Harvest
Use sharp scissors or gardening shears to avoid damaging the plants. Gently twist or cut fruits and vegetables off the plant, and handle them carefully to prevent bruising.
End-of-Season Cleanup
As the growing season comes to an end, there are a few crucial steps to keep your raised bed garden healthy for the next year.
Remove Debris
Clear out any dead plants, fallen leaves, or other debris that could harbor pests over the winter. You can compost healthy plant matter to recycle nutrients back into your garden.
Soil Management
Consider adding a new layer of compost to your soil before winter. This helps improve its nutrient content by the time you’re ready to plant again in the spring.
Cover the Bed
Covering your raised beds with a tarp or mulch can protect the soil from heavy rains and snow, as well as prevent nutrient leaching.
Preparing for Next Season
As winter approaches, you might find it relaxing to plan for next year’s garden. Research new plants you want to try and modifications to the layout that could make your garden even more fruitful.
Successive Planting
If you want to keep your raised bed productive, consider the concept of successive planting. Plan to plant a quick-growing fall crop, or even select overwintering vegetables that can thrive with minimal care during the winter months.
Starting Seeds Indoors
If you’re eager to jump into gardening early, you can start seeds indoors. This is a great way to grow plants that require a longer season or that you want to have a head start on for delivery to your raised bed in the spring.
Creating a raised bed garden is a fulfilling journey that connects you with nature and the food you eat. By following these steps, you can cultivate a thriving garden that brings joy not just to you but also to your family and friends. Happy gardening!

